Integration Guide: Connecting Lumi Business Inventory Point of Sale with Moniepoint POS
What This Integration Does
This integration allows Lumi Business to send card and transfer payment instructions directly to your Moniepoint POS during checkout. This eliminates manual entry at the POS and ensures your sales and payment records always match.
Information Required
Part 1: Business Credentials (add these first)
You will get these from the Moniepoint Business App:
Android App link here : https://play.google.com/store/apps/details?id=com.moniepoint.business&pcampaignid=web_share
Client ID
API Key
Merchant Name (as registered on Moniepoint)
ERP Integration must be enabled
Part 2: Terminal Credentials (add these after business credentials are saved)
You will collect this for each POS device:
Terminal ID
Serial Number (SN)
Account Name linked to the terminal
Account Number linked to the terminal
Step 1: Enable ERP Integration in Moniepoint
Open the Moniepoint Business app.
Tap your Profile Picture (top right).
Scroll and tap Settings.
Tap POS Configuration.
Tap Terminal Features.
Turn ON ERP / POS Configuration Integration.
Step 2: Get Your Business Credentials (Client ID and API Key)
In the Moniepoint Business app, go to Settings.
Tap Developer.
Tap ERP.
Tap Configure Custom POS.
Tap Add New Client.
Enter any Client Name (for example: Lumi Business POS).
Select Live Environment.
Moniepoint will generate:
Client ID
API Key
Copy and save these immediately.
Step 3: Get Your Terminal Credentials
You can find Terminal ID and Serial Number (SN):
On the POS printed receipt
Or on the sticker at the back of the POS device
Or in the email/SMS sent when you received the POS
Write down:
Terminal ID
Serial Number (SN)
Account Name
Account Number
Step 4: Add Business Credentials in Lumi Business (Done First)
Open the Lumi Business app.
Tap More from the menu.
Tap Apps.
Tap Manage Moniepoint.
Tap Add Business.
Enter:
Client ID
API Key
Merchant Name
Save.
This step must be completed before terminals can be added.
Please fill in your Client ID, API Key, and Merchant Name. You may leave the Webhook Secret field blank for now; it will be added later.
Step 5: Add Terminal Credentials in Lumi Business
Still in Manage Moniepoint, tap Add Terminal.
Enter:
Terminal ID
Serial Number (SN)
Account Name
Account Number
Select the Store where this POS will be used.
Turn ON Use this at Checkout.
Save.
Repeat this step for every POS device your business uses.
Step 6: Add the Webhook (Final Step)
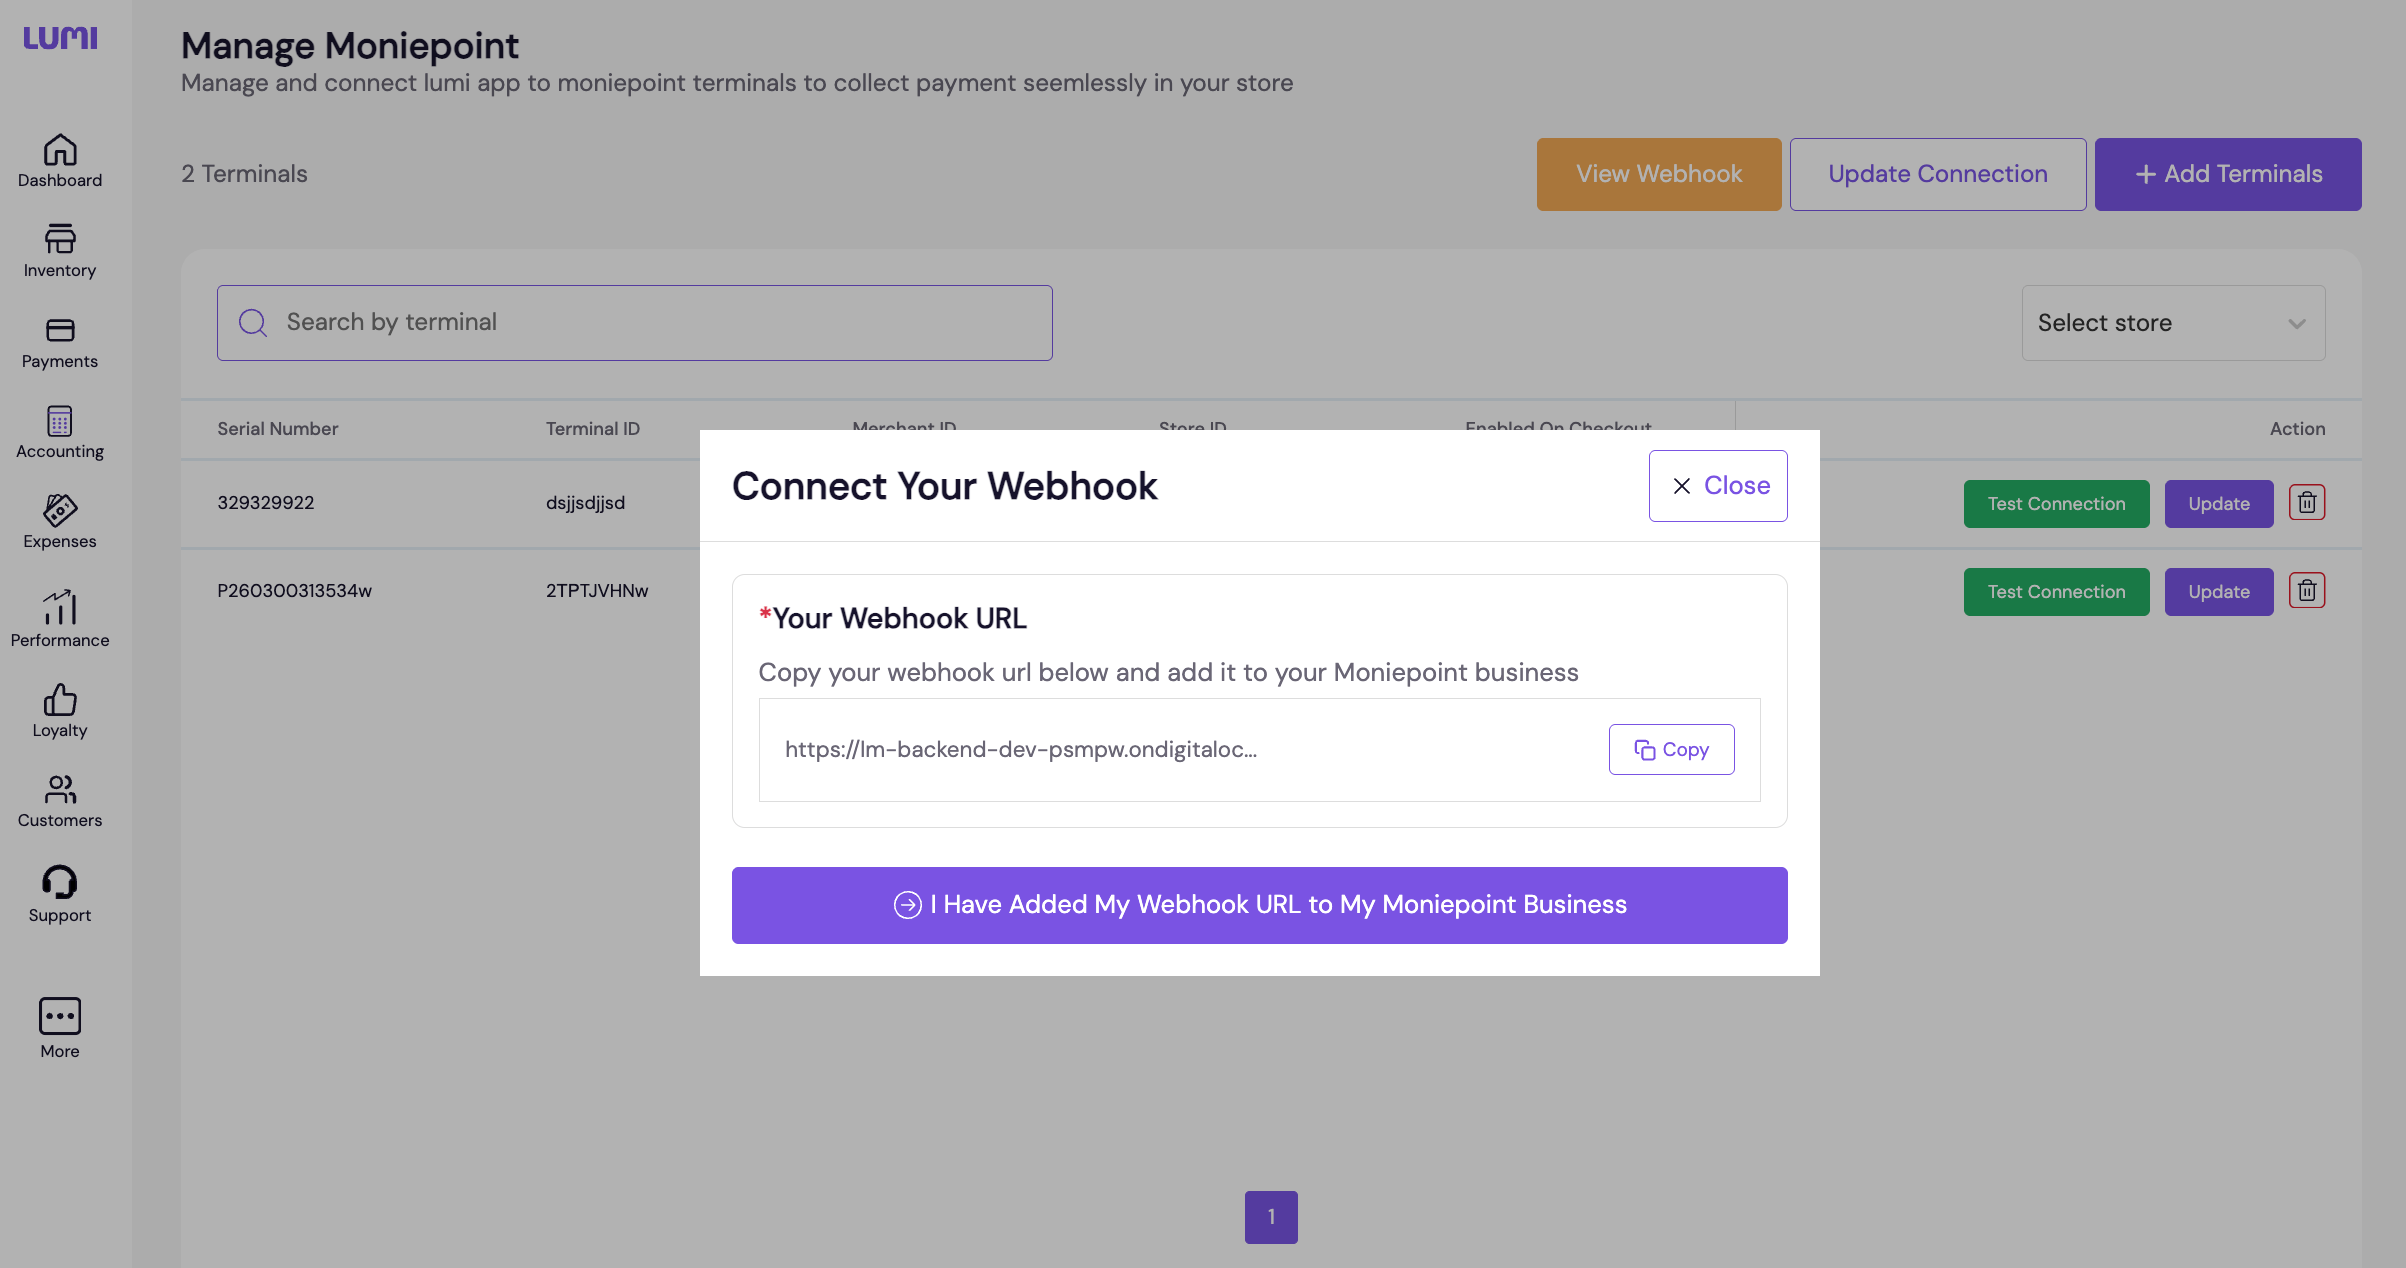
After adding your terminal, Lumi Business will display a Webhook URL.
Copy this Webhook URL.
Open the Moniepoint Business app again.
Tap Profile.
Tap Settings.
Tap Developer.
Tap Webhook.
Tap Add New Event.
Paste the Webhook URL.
Save.
After creating the webhook , Click on Get API Secret and then copy and paste it on Webhook Secret field on Update Connection Page
Testing the Integration
Open Lumi Business and go to Sell Mode.
Add item(s) to cart.
Select Payment Method.
Select Card.
Select Moniepoint.
Lumi Business will send the payment details to the POS.
The Moniepoint POS will notify you to complete the payment.
Process the payment normally on the POS.
The transaction will automatically confirm in Lumi Business.
Related Articles
OPay POS Integration Guide for Lumi Business
1. Overview Integrating your OPay POS terminals with Lumi Business gives your store faster checkouts, real-time payment tracking, and stronger fraud protection. Instead of typing amounts manually into the terminal, Lumi sends the exact sale value ...Lumi Business × Interswitch SmartPOS Integration Guide
Overview The Lumi × Interswitch SmartPOS integration allows your Lumi Point of Sale (POS) system to collect card and transfer payments directly through an Interswitch SmartPOS or Quickteller Paypoint terminal. Once connected, every transaction ...Barcode Scanning on Lumi Point of Sale (POS)
OVERVIEW Lumi Point of Sale (POS) supports barcode scanning directly through the device camera, allowing users to quickly search and add products to cart without manual entry. Key Functionalities Scan product barcodes using the in-app camera scanner. ...How to integrate Chowdeck Order with Lumi Business
Overview Connecting your Chowdeck store to Lumi Business gives your food, grocery, and pharmacy business a major advantage. Once linked, you can manage all Chowdeck orders directly inside Lumi without switching between platforms. Your products stay ...What's New on Lumi Business: Release 10
Dear Business Partners, We’re excited to share the latest updates to Lumi Business,designed to help you run your business more securely, efficiently, and profitably. With these improvements, you can now take advantage of powerful new features, plus ...