How to Create a Storefront on Lumi Business:
This feature is the visual and interactive aspect of a retail business where products and services are displayed for customers to browse, select, and purchase. It serves as the interface between the business and its customers.
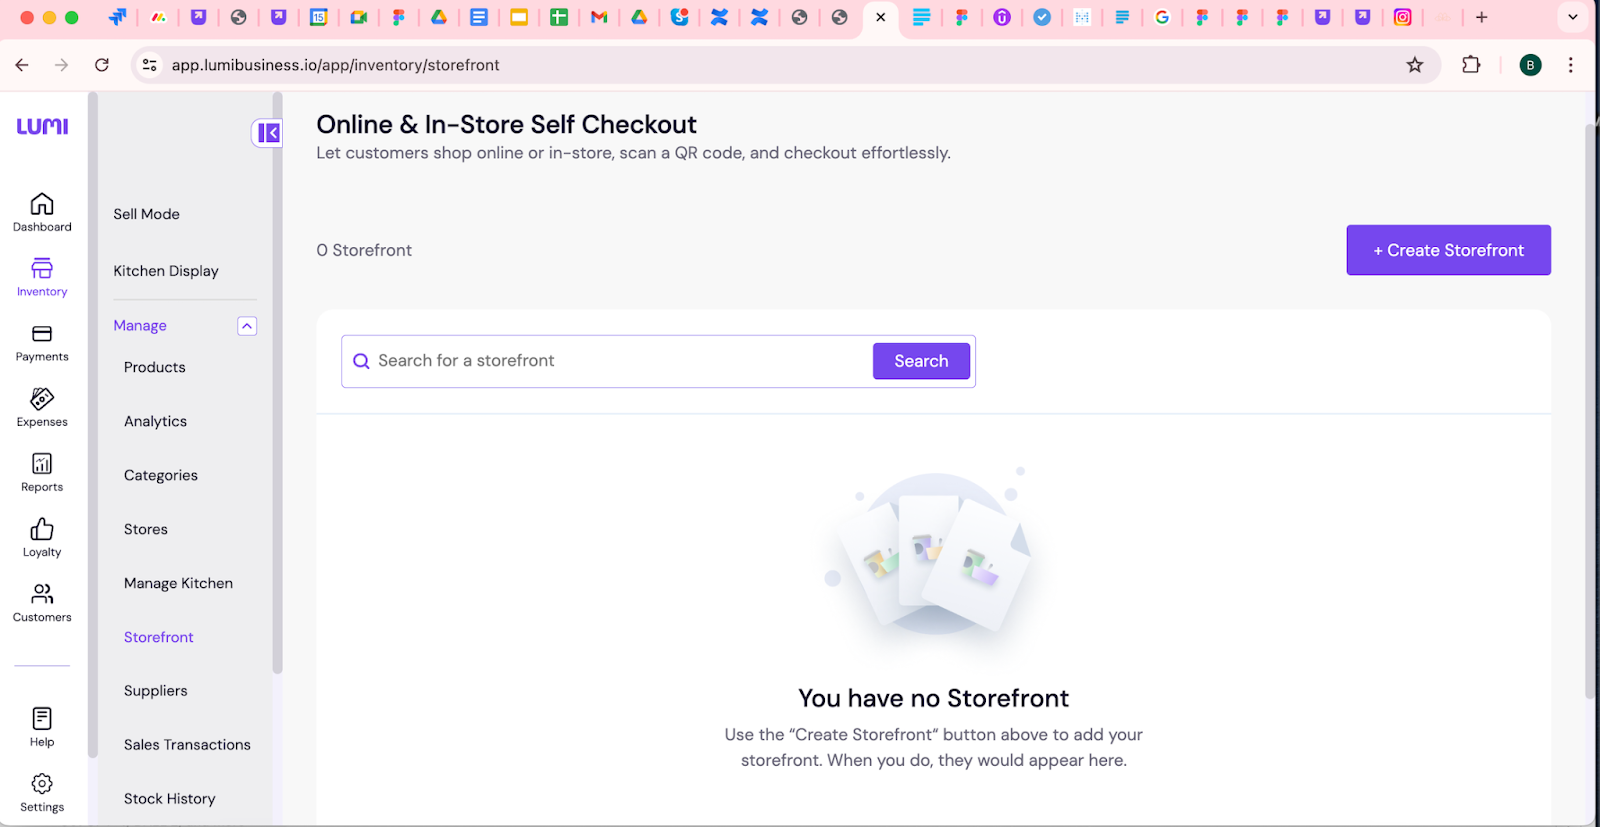
Step1:
Log in to your Lumi business account, click on Inventory, then select the "Manage" tab. Scroll down and click on "Storefront," then click the "Create Storefront" button.
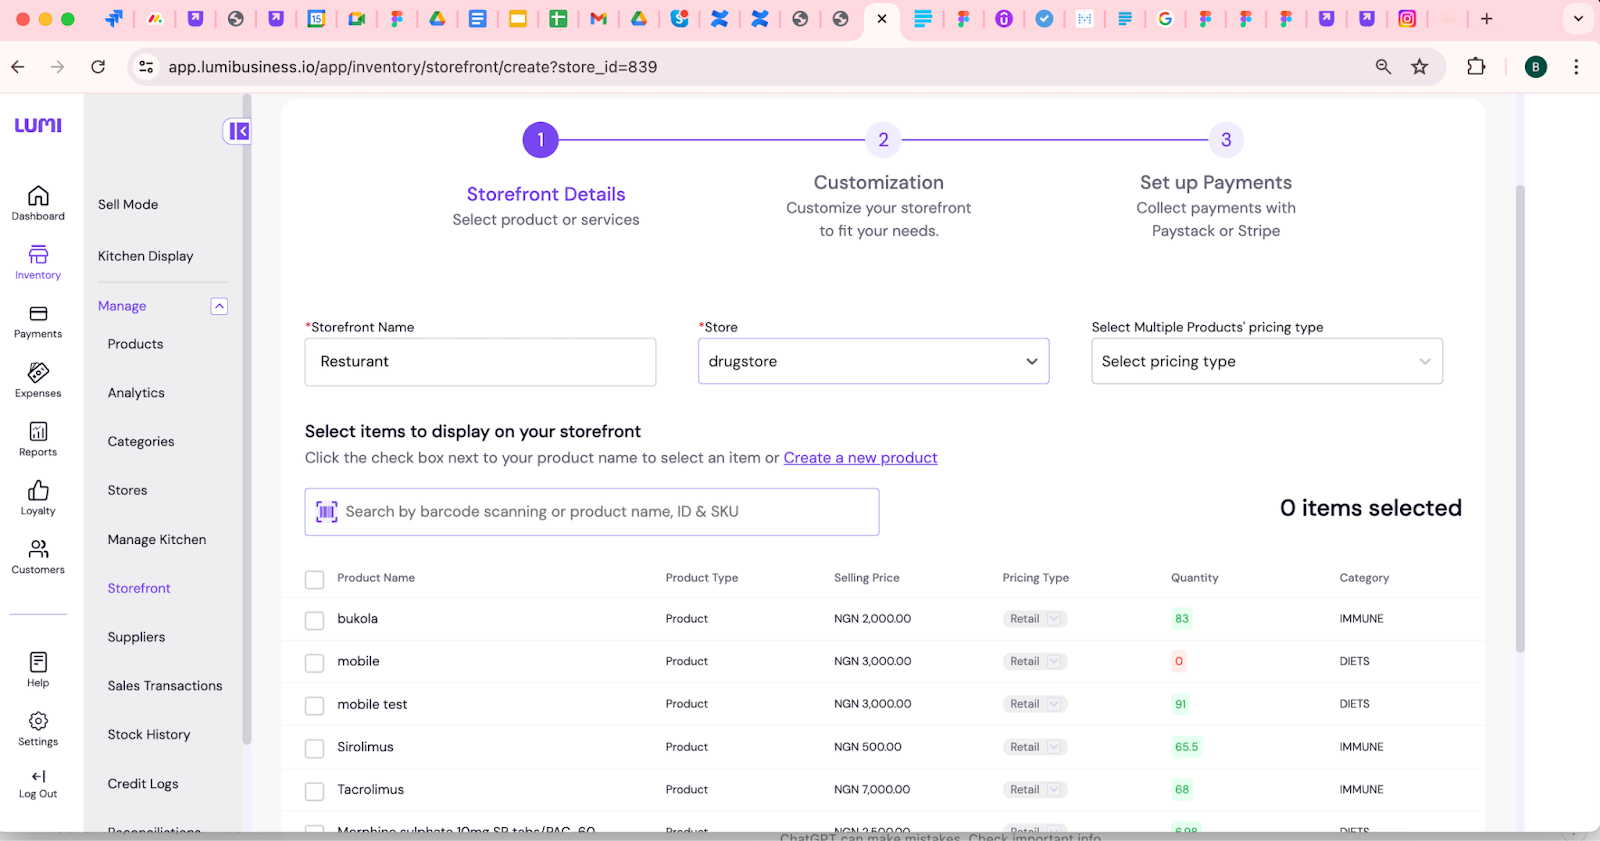
Step 2:Storefront details
After clicking on "Create Storefront," you will begin with "Storefront Details." The first step on this page is to enter the store "Name," select "Store," and choose the "Pricing Type" that will be used across products. Next, you will select the items to be displayed on your storefront. Once you've made your selections, click "Next" at the top right corner of the page.
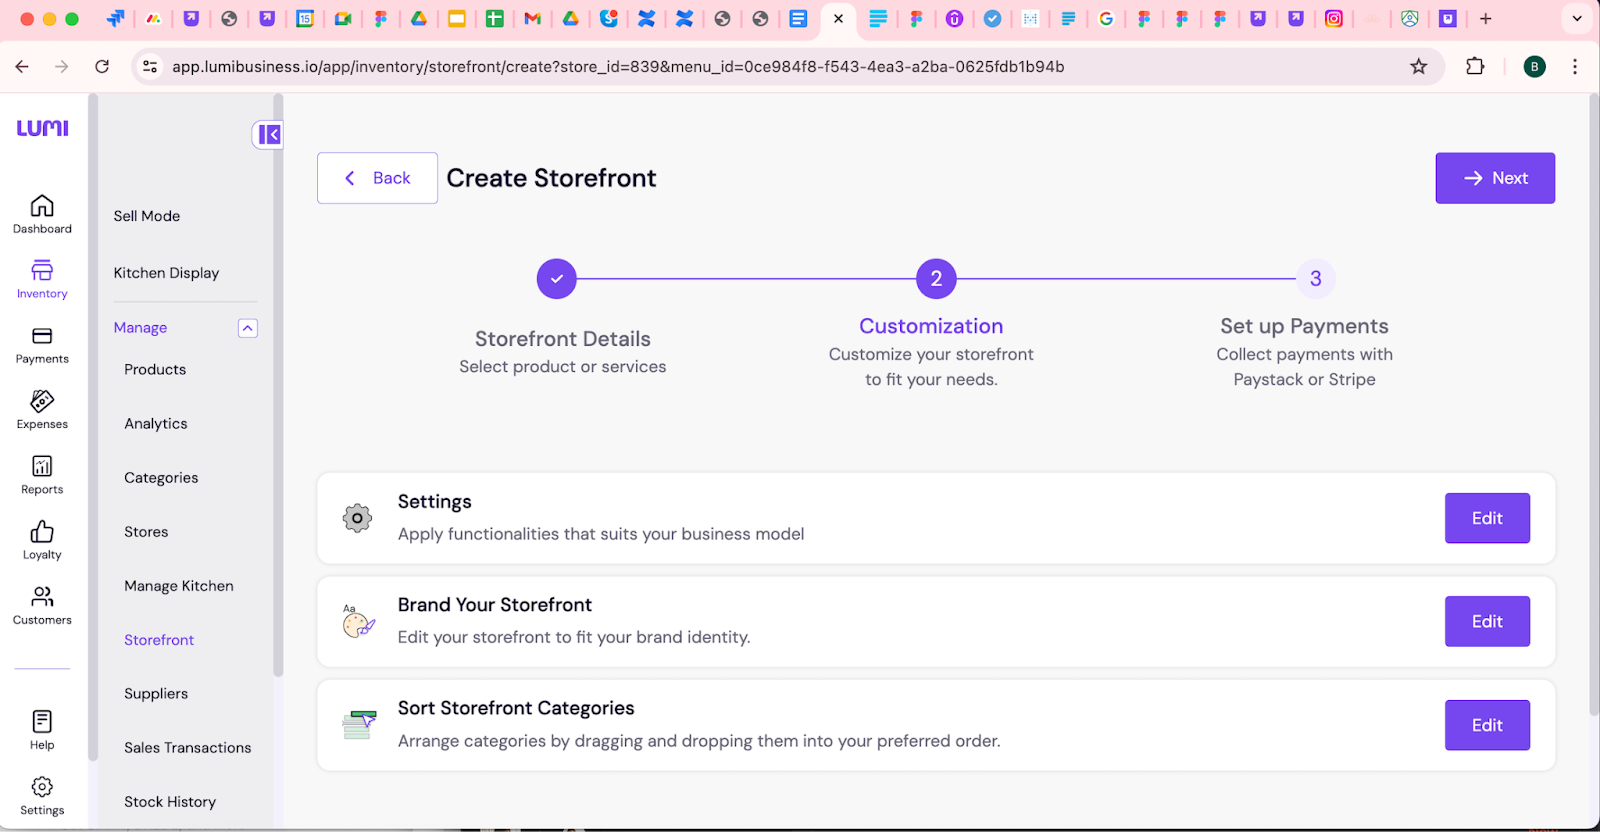
Step 3: customization
setting:
The next page is for customizing your storefront. First, toggle the "Allow Online Payment" setting on or off and check the box for "Allow Delivery on Checkout." Finally, click "Done."
Brand your store:
Click "Edit," then click the "+" button to upload your store logo. Select your brand's primary and secondary colors, then click "Save."
Sort Category:
To arrange storefront product categories, drag and drop them in your preferred order, then click "Save."
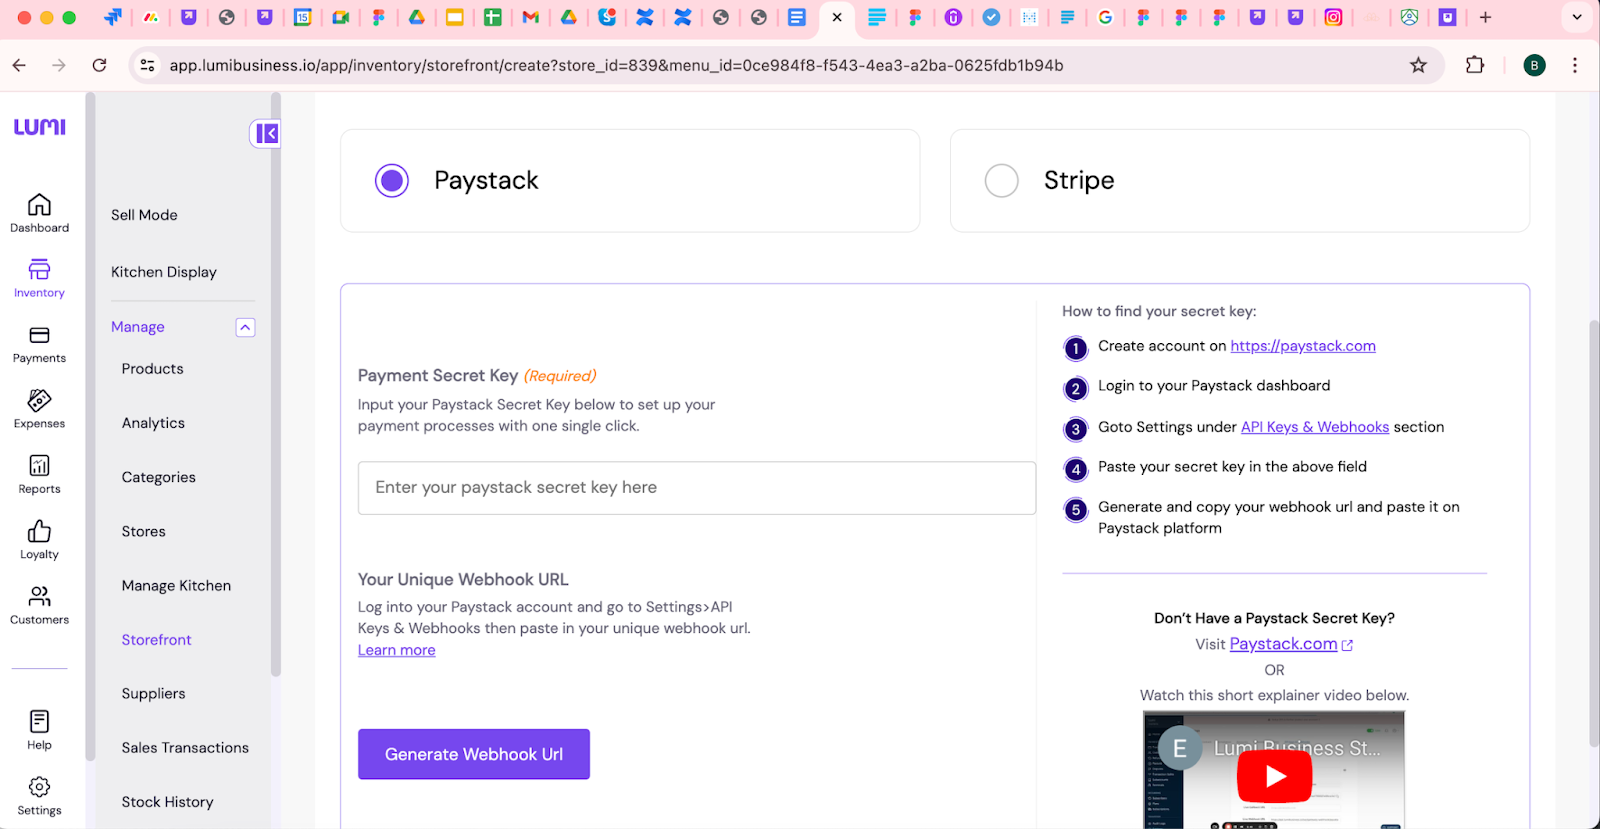
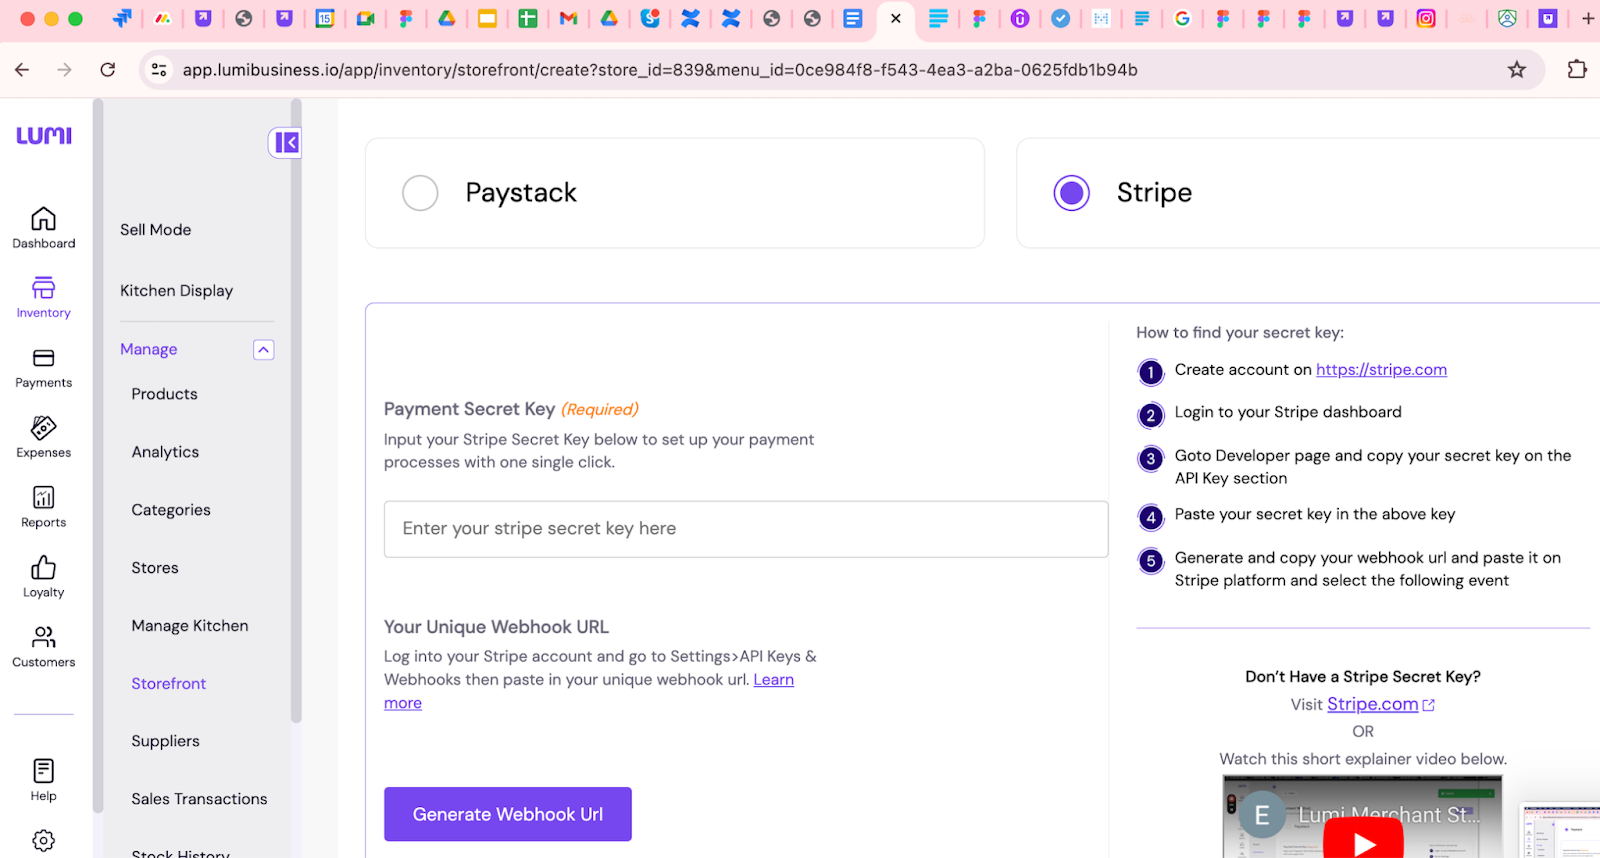
Step 4: Setup payment method
Paystack:
Log in to your Paystack account, go to "Settings," and click on "API Keys & Webhooks." Copy your "Live Secret Key" and then navigate back to your Lumi business account. Paste the "Live Secret Key" into the "Payment Secret Key" field. Next, click on "Generate Webhook URL" in Lumi. Once it's generated, return to Paystack and paste the generated URL into the "Live Webhook URL" field. Finally, click on "Save Changes" to complete the process.
Stripe:
To integrate Stripe with your Lumi account, start by logging in to your Stripe account. Navigate to the "Developers" section, input your password, and click "Continue." Next, go to "API Keys" and click "Reveal live key." Copy this key and return to your Lumi account to paste it under "Payment Secret Key." Proceed by clicking on "Generate Webhook URL" in Lumi.
Now, return to Stripe and navigate to the "Webhooks" section. Click on "Add Endpoint," paste the generated webhook URL under "Endpoint URL," and enter a description. Next, click on "Select Event" and check the boxes for "Checkout Session Completed," "Charge Captured," "Charge Succeeded" under "Checkout," and "Payment Intent Succeeded" under "Payment." Finally, click on "Add Endpoint."
After setting up either of these payment methods, click on "Next."
For a visual guide, please watch the video below.
If you encounter any challenges or require further guidance during this process, don't hesitate to reach out to our dedicated support team at customerservice@enlumidata.com. We're here to assist you every step of the way.
Related Articles
How to Connect Your Custom Domain to Your Lumi Business Storefront
Welcome to our step-by-step guide on connecting your domain to your Lumi business storefront. Whether you want to use your primary domain (for example, scopelagos.com) or a subdomain (like shop.scopelagos.com), this guide will walk you through the ...Lumi Business Product Update: Release 8
We are excited to introduce several new features for merchants in the Lumi ecosystem. These updates are designed to improve store management, storefront management, and overall customer experience. Below is a detailed breakdown of each feature and ...Lumi Business Product Update: Release 16
1. Procurement Management Overview The procurement system is designed to streamline the entire purchasing lifecycle from creating purchase orders to receiving goods and managing bills. With modules for PO creation, goods receipt (GRN), billing, ...How to integrate Chowdeck Order with Lumi Business
Overview Connecting your Chowdeck store to Lumi Business gives your food, grocery, and pharmacy business a major advantage. Once linked, you can manage all Chowdeck orders directly inside Lumi without switching between platforms. Your products stay ...How to Create Loyalty Campaign on Lumi Business
Loyalty helps you improve customer retention and convert new customers to returning customers. Here are the steps to follow to create loyalty campaign on Lumi business Step 1 : Create a Campaign To create a campaign, go to the loyalty section and ...